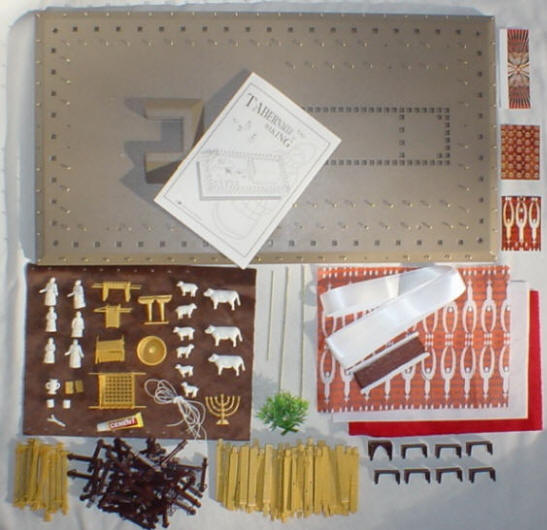
Customizing Your Tabernacle Kit
This page gives information that we recommend that is not listed in the
manufacturer's instruction manual.
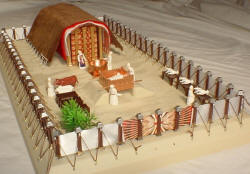
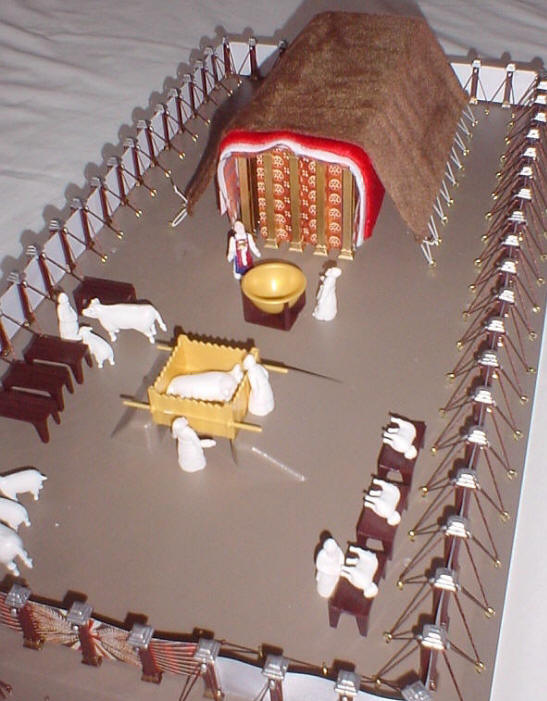
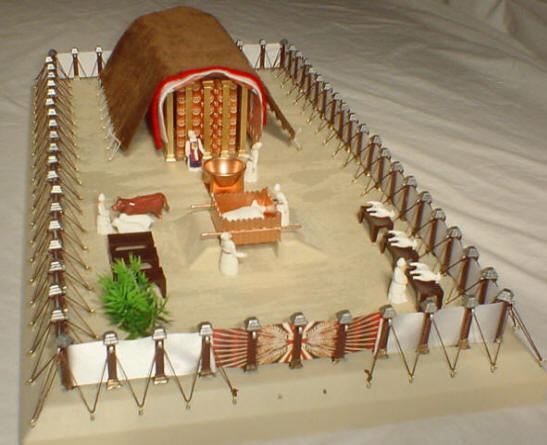
The Tabernacle kit is ready to assemble and doesn't require painting to be used.
We think that you can really make your model look better by painting. If this is
a class project then painting also allows for more jobs among the class. Below
are some examples of painted versus non-painted models:
If you decide to paint the model then here is what we recommend:
PAINTS:
(Recommend acrylic paints designed for plastic models)
- Metallic Gold
- Metallic Silver
- Metallic Bronze (substitute copper or brass paint if you can’t find metallic
Bronze)
- “Sand” color flat
We recommend that you take a couple of tablespoons of clean dry craft sand and
sprinkle it in a zig zag pattern in the wet “sand” colored paint.
If you want to paint the rubber figurines of the priests & animals you can use
these paints but note that plastic model paint doesn’t stick well to the rubber.
You will need only tiny amounts of these paints (these paints take days to dry
on rubber. If you find a better paint then let us know…):
- Brown flat
- “Flesh” flat
- Red Flat
- Blue Flat
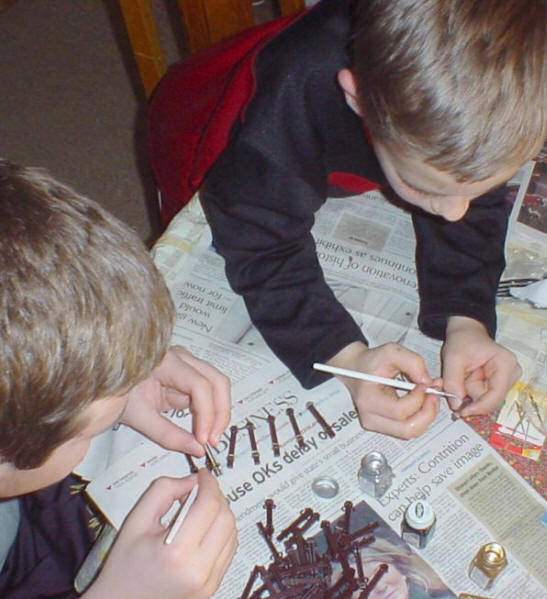
RECOMMENDED TOOLS:
You can complete the model without tools but we have found these tools to be
very helpful:
- Tweezers for managing tiny figurines and rope strings
- Small wooden mallet
- Tissue paper
- Small ¼ inch paintbrush for painting base & small 1/8 in. paint brushes for
other items
- Scissors for cutting rope string.
- Toothpicks for mixing paint and scraping off any stray painting.
- Newspaper or other paper to protect from stray paint.
- Paper towels and other cleanup items.
WHAT TO DO:
If you decide to paint the model then we recommend that the first thing you do
is paint the base with the sand colored paint and then quickly LIGHTLY sprinkle
a small amount of sand in the wet paint in a zig-zag pattern to simulate desert
sand dune type pattern. If any sand and paint get in the holes then wipe it out
with the tissue so that the sand doesn’t hinder the posts from being put in the
holes after the paint dries. Use the tissue paper to wipe any paint that gets on
the shiny brass hooks (catches) around the base. Make sure all of your hooks
are securely set.
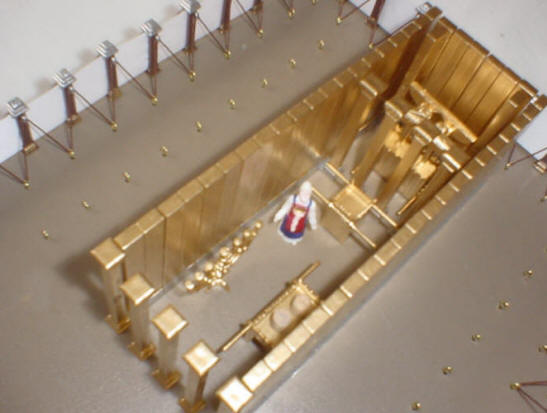
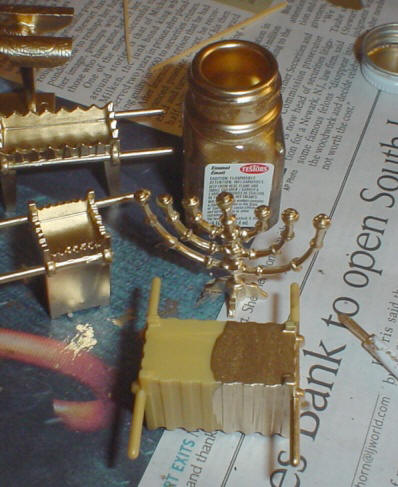
Paint the tops of the courtyard posts silver and their bases
bronze. Paint the
post hooks silver also. Don’t get any paint on the part of the base that goes in
the holes.
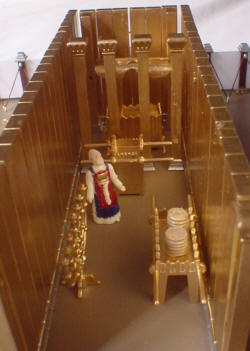
Paint the following other items metallic bronze:
- Bronze Altar Ark
- Laver (bowl)
and Laver base and
- base of 5 posts at the entrance to the main tabernacle tent.
Paint the bases of the main tent Tabernacle walls silver as well as the bases of
the 4 posts in the center wall of the main Tabernacle tent.
Paint the following items
metallic Gold:
- Ark of the Covenant
- Atonement Cover
(cherubim)
- Altar of Incense
- Table of Shewbread
- Menorah (Lampstand),
- walls and
posts of main tabernacle tent.
- Breastplate on high priest.
OTHER PAINTING:
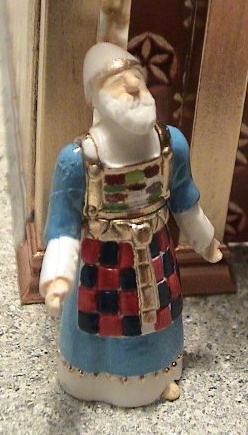
Paint the bulls flat brown, paint the high priest with an outer
red apron and an inner blue apron (see below and website for photos). Paint the
faces of the priests with a flesh color. Paint Aaron’s rod that budded brown,
the golden jar of manna gold and the ten commandment tablets brown and put them
in the Ark of the Covenant.

 Laurie
Hey wrote to tell us these suggestions about painting the small part and the
rubber priests and animals: Laurie
Hey wrote to tell us these suggestions about painting the small part and the
rubber priests and animals:
“We also discovered that these fine point markers
http://www.amazon.com/Staedtler-Lumocolor-Point-Permanent-Marker/dp/B001O6RL06/ref=pd_bbs_6?ie=UTF8&s=office-products&qid=1235767599&sr=8-6
work well to color the heifers and the priestly garments. Because of their very
fine tips, they are easier to work with than the paints, which as you point out,
take forever to dry.
The set I have includes 8 colors, including dark brown or black for the beards,
and blue, read and purple for the priestly garments; I think this one would work
as well
http://www.artstuff.net/staedtler_permanent_lumocolor_fine_markers.htm It is
also available with a superfine point from the same website.
This gold fine tip calligraphy pen works very well for the gold accents
http://www.amazon.com/gp/product/B000XAOSZU “
Thanks for the tip Laurie!
Priest Photo Source: Ray Tull
Other ideas:
It is easy to loose some of the brass hooks. You can get gold or
brass colored wire from your local hobby store to make more hooks if you loose
some. If you are doing this as a class project then we recommend that you spend
a couple of weeks painting and the last week assembling your model. If your
posts won’t fit into the holes then take some light sandpaper and sand the
bottom of the posts and the holes to make them fit in. An adult can even trim
them a little with a sharp hobby knife. If they fit in too loosely then use some
of the cement included in the model to make them stick securely.
If you do something special then let us know.
TAKE CARE THAT CHILDREN ARE NOT
ENDANGERED TO SWALLOW SMALL PARTS!
|